Button & Blog Template Tutorial
The first thing you need to do is get Adobe Photoshop. They have a 30-day free trial that you can download from their website, http://www.adobe.com. You also need to download winzip or PKzip to unzip the demo (there are details about this on the Adobe site). The download takes about half an hour over DSL, so be prepared to start it and then go do something else for awhile.
BUTTON
The first thing I worked on was my button. I started based on this post from Geeky Knitter. This is a great tutorial on how to create a basic button. I then went nuts and added a photo, which I used for both my button and my banner.
PHOTO
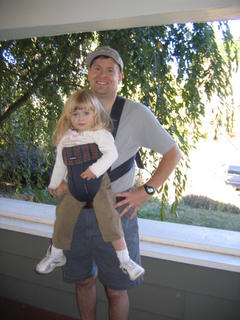
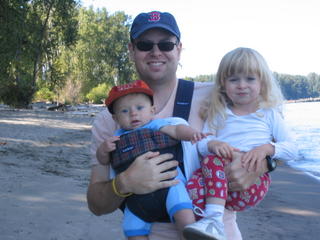
This was the part that took me FOREVER to figure out. Open Photoshop. Then go to the file menu and select File --> Open. Open whichever picture you want to use. I then wanted to put a new background behind the kids. First, I had to erase the background of the original photo. To do this, go to Filter --> Extract. This will bring you into a window where you use a highlighter (the button at the top left, which is the default when you come in) to go around the area of the picture that you want to keep. You don't have to be perfect in highlighting the edges, but you want to be as close as you can. Click Ctrl-Z if you screw up and want to undo. Once you have the outline of your picture highlighted, click on the paint bucket in the toolbar on the left, and then click in the area that you want saved. You then want to hit the Preview button on the upper right to see what your picture will look like.
When you hit Preview, the background goes to grey-and-white checks, which indicates that that area is transparent and will show whatever background you pick out in the next step. You will likely have some weirdness around the edges of your photo, which you can erase using the Cleanup Tool in the left toolbar (it's the 5th button from the top). You can also use the Edge Touchup Tool (right below the Cleanup Tool) to smooth out your edges. Play around with these two tools, using Ctrl-Z to undo whenever you screw up, until you're happy with how your picture looks. Also, remember that the picture will be much smaller in your banner or button, so little imperfections won't be too noticeable.
When you're happy with your pic, hit OK and your cut-out photo will be put into your main Photoshop window. Save a copy at this point so you are free to play around with the different sizes you'll need for your button and your banner.
Now you want to resize your picture to fit your button. If you want to crop it at all, use the crop tool in the toolbar on the left (it's the third button down in the left-hand column). Select the area you want to crop, and then click on the check-mark at the top right ("Commit current crop operation") to make it permanent. To resize, go to Help --> Resize Image. You will go into the Resize Image Wizard. Select Online in the first screen. In the second screen, you want to size the height of the image to fit in your button. I used 31 pixels as per Geeky Knitter's tutorial. The width will fill in automatically based on the height you enter. When you get back into Photoshop, your image will likely look teeny tiny. You can fix this going into the bottom left corner of the window and changing the percent number you find there to 100%. This shows you the actual size. If you don't like it, go back and do it over. Just make sure you note the final height you go with, if it's not 31, so that you can make your button the same height.
Once you get your photo sized the way you want it, go to the File menu and choose New. A window pops up that allows you to enter the dimensions of your new item, which in this case is your button. So, going with Geeky Knitter's sizes, you'd enter width of 88 pixels and height of 31 pixels. Leave everything else alone. The little white rectangle in the middle of your screen is your button!
Now to get your picture into your button. Go to the Window menu and choose Resize Wizard. This will pop up your little 31-pixel high photo. Click on the selection tool in the toolbar (the upper left rectangle thingy) and select the whole photo. Copy it using either the Edit --> Copy menu or Ctrl-C. Click on your button and paste. Voila! Your photo should now be inside your button. To move it around, use the arrow on the toolbar (to right button).
You can now go back and play around with text and background (Geeky Knitter's tutorial gives complete instructions on how to do this). And you have your button!
BANNER
The instructions for the banner are basically the same, except you will work with a different size file. My banner is 760x130 pixels, which I think is relatively standard (although I can't remember how I came up with this number, so take it as the wild guess that it is...). I resized my little picture to be 130 pixels tall, then played around with text and background until I was happy.
BACKGROUND I decided that I wanted a custom background as well. So, I whipped up a little square in Photoshop that I then used as a repeat to create my background. This is what the basic image looks like:

This is then repeated in your template to create a tiled background. I'll show you how to do this in a minute...
TEMPLATE
Now we get into the fun stuff - the HTML you'll need to change for your template. The first thing that you need is a place to host the images that you just created. I have my own website that I'm going to use if my design business ever gets off the ground, which is where I hosted the images. You might be able to figure out how to use the Blogger photo hosting, but I couldn't figure out how to get the banner to be full-sized when I uploaded it to Blogger. Get your images uploaded to the web, and get the URLs.
Next, you'll want to play with your template. I recomment going in and creating a new blog to play around with so you don't mess up your regular blog. I created "knittinmomtest.blogspot.com". Also, copy and paste into and out of Notepad so that you can backtrack whenever you screw up.
I started with the simplest blogger template, which was Minima. In the comments at the top, where the template designer's blurb is, I added text that my template was based on the Minima template (hopefully this will give due credit to the original designer).
First thing was to get the banner up. This goes in the very top of the body section of your template. I'm not sure how to put HTML in a post without it converting to HTML, so I can't really give you a good step through the code. Feel free to go and look at my template code by using the View --> Source option. I've put some notes in my code prefaced by CODE NOTE where I've changed things. Basically, I commented out the code between "div id=header" and "/div" and replaced it with a link to the banner image file.
Next, you want to get your background up. This is done in the head section, where the style sheet is (this is the loooong part of the code that sets all the fonts, backgrounds, etc.). At the very top of the style sheet, in the section titled "body", I put this as my first line: "background:#fff url("http://gardineryarnworks.com/images/bkgrnd2.gif") 50% 0;" The url is the link to my little background file.
A couple other changes I made to the style sheet - in the Header section, I changed the header width to 760. I may have changed the padding as well - I can't remember! In the Content section, I changed the content width to 760 and increased the main width to 510. This will make all of these sections as wide as your new banner.
You can also play around with your font colors on the style sheet. For example, under the body style, there is a section for link, visited, and hover. These will give you the color of your links. A good way to get the bizarre numbers that identify the different web colors is to go back into Photoshop. Click on the color picker and check the little box at the bottom that says "Web Colors Only". You then use the rainbow-looking column in the middle to choose which color you want (i.e. to get green shades, click on the green bars down towards the bottom of the column - to get red shades, click on the red bars at the very top). You can then click on the big square to the left to get the exact shade that you want. When you click, the top of the rectangular box to the right of the rainbow column will turn to the color that you've selected. Once you get the one you like, go to the box at the very bottom that's to the right of the # sign. That is your color number, and is what you want to put into the style sheet after "color:#". You'll also want to select the color of your headings which is in the h2 section. Basically, you want to scroll through the entire style sheet and look for anyplace that says "color:#..." and see if it looks like it's a text thing.
Play around, using the Preview option often to see what happens when you change different things. One thing I learned in my years as a computer programmer is change only one thing and see what happens. It's harder to figure out what you've done right or wrong when you change a bunch of stuff at once and then look at the results. So change one little thing, preview, and see if it did what you want. If it didn't, change it back (this is where your copy/paste into Notepad comes in handy).
Some other resources I found handy while playing around were Blogger's help on Template Tags and this page on style sheets which also has links to a couple HTML tutorials listed at the top.
I hope this is all useful! If it is, please feel free to link back to share this with others (please don't copy the text, though). If you find better ways of doing things, please add a comment! And most of all - have fun! I had a blast making my template, and I'll be very sad when my Photoshop trial ends and I can't play anymore. I'd be tempted to buy it if it wasn't $600 (!).
Enjoy!

